Using SMART EMS
Devices
This section allows you to manage existing devices. Please be aware that by default only a few selected columns are visible, you can adjust them by using the visible columns functionality.
Mass actions
You can perform the following mass actions:
Disable
Enable
Reinstall primary config
Reinstall secondary config
Reinstall tertiary config
Reinstall primary firmware
Reinstall secondary firmware
Reinstall tertiary firmware
Request config data
Request diagnose data
Add variable
Delete variable
Set template - Please refer to Applying a template section for more information
Add access tags
Delete access tags
Add labels
Delete labels
Delete
Row actions
You can perform the following extra actions on a single row:
Details - Open details about a device. Please refer to the Details section for more information.
Certificates - Expandable group of actions connected to certificate management of the selected device. Visible only for devices that support certificate types.
Upload separate files - Opens a dialog that allows you to upload a public key, private key and CA certificate.
Upload single file (.p12, .pfx) - Opens a dialog that allows you to upload a public key, private key and CA certificate as a single PKCS #12 file.
Delete certificate - Delete certificates after they are uploaded as separate files or a PKCS #12 file.
Download certificate - Download public key as .crt file.
Download private key - Download private key as .key file.
Download CA certificate - Download CA certificate as .crt file.
Download .p12 - Download PKCS #12 file containing public key, private key and CA certificate.
Logs - Expandable group of actions connected with logs. Visible only for devices that support logs.
Communication logs - View communication logs for the selected device
Device commands - View device commands for the selected device
Config logs - View config logs for the selected device
Diagnose logs - View diagnose logs for the selected device
Applying a template
The template contains a common setup for many devices. When applying a template you can choose what parts of a template will be overwritten in a device. You can select from the following options:
Device description
Variables
Access tags
Labels
Overwriting means that i.e. in case of variables, existing ones will be removed and variables from the template will be copied into the device.
While applying a template you can also choose to reinstall configs and firmwares that are supported in this template.
Applying a template to a specific device also means that the communication protocol will use configs and firmwares directly from the applied template.
After applying a template to a device, you can change the device description, variables, access tags and labels. This will not affect the template itself or other devices using the same template. The same rule applies from the template perspective. You can change the device description, variables, access tags and labels in the template. For the changes to be transferred to devices, you have to apply the template to a device. Changing config or firmware in the template will affect all devices that are using this template.
Templates support versions. Each template can have one version assigned to “Staging” and one version assigned to “Production”. Devices that have the “Staging” flag set to true will use the “Staging” version of a template. In case the “Staging” version does not exist, such a device will use the “Production” version.
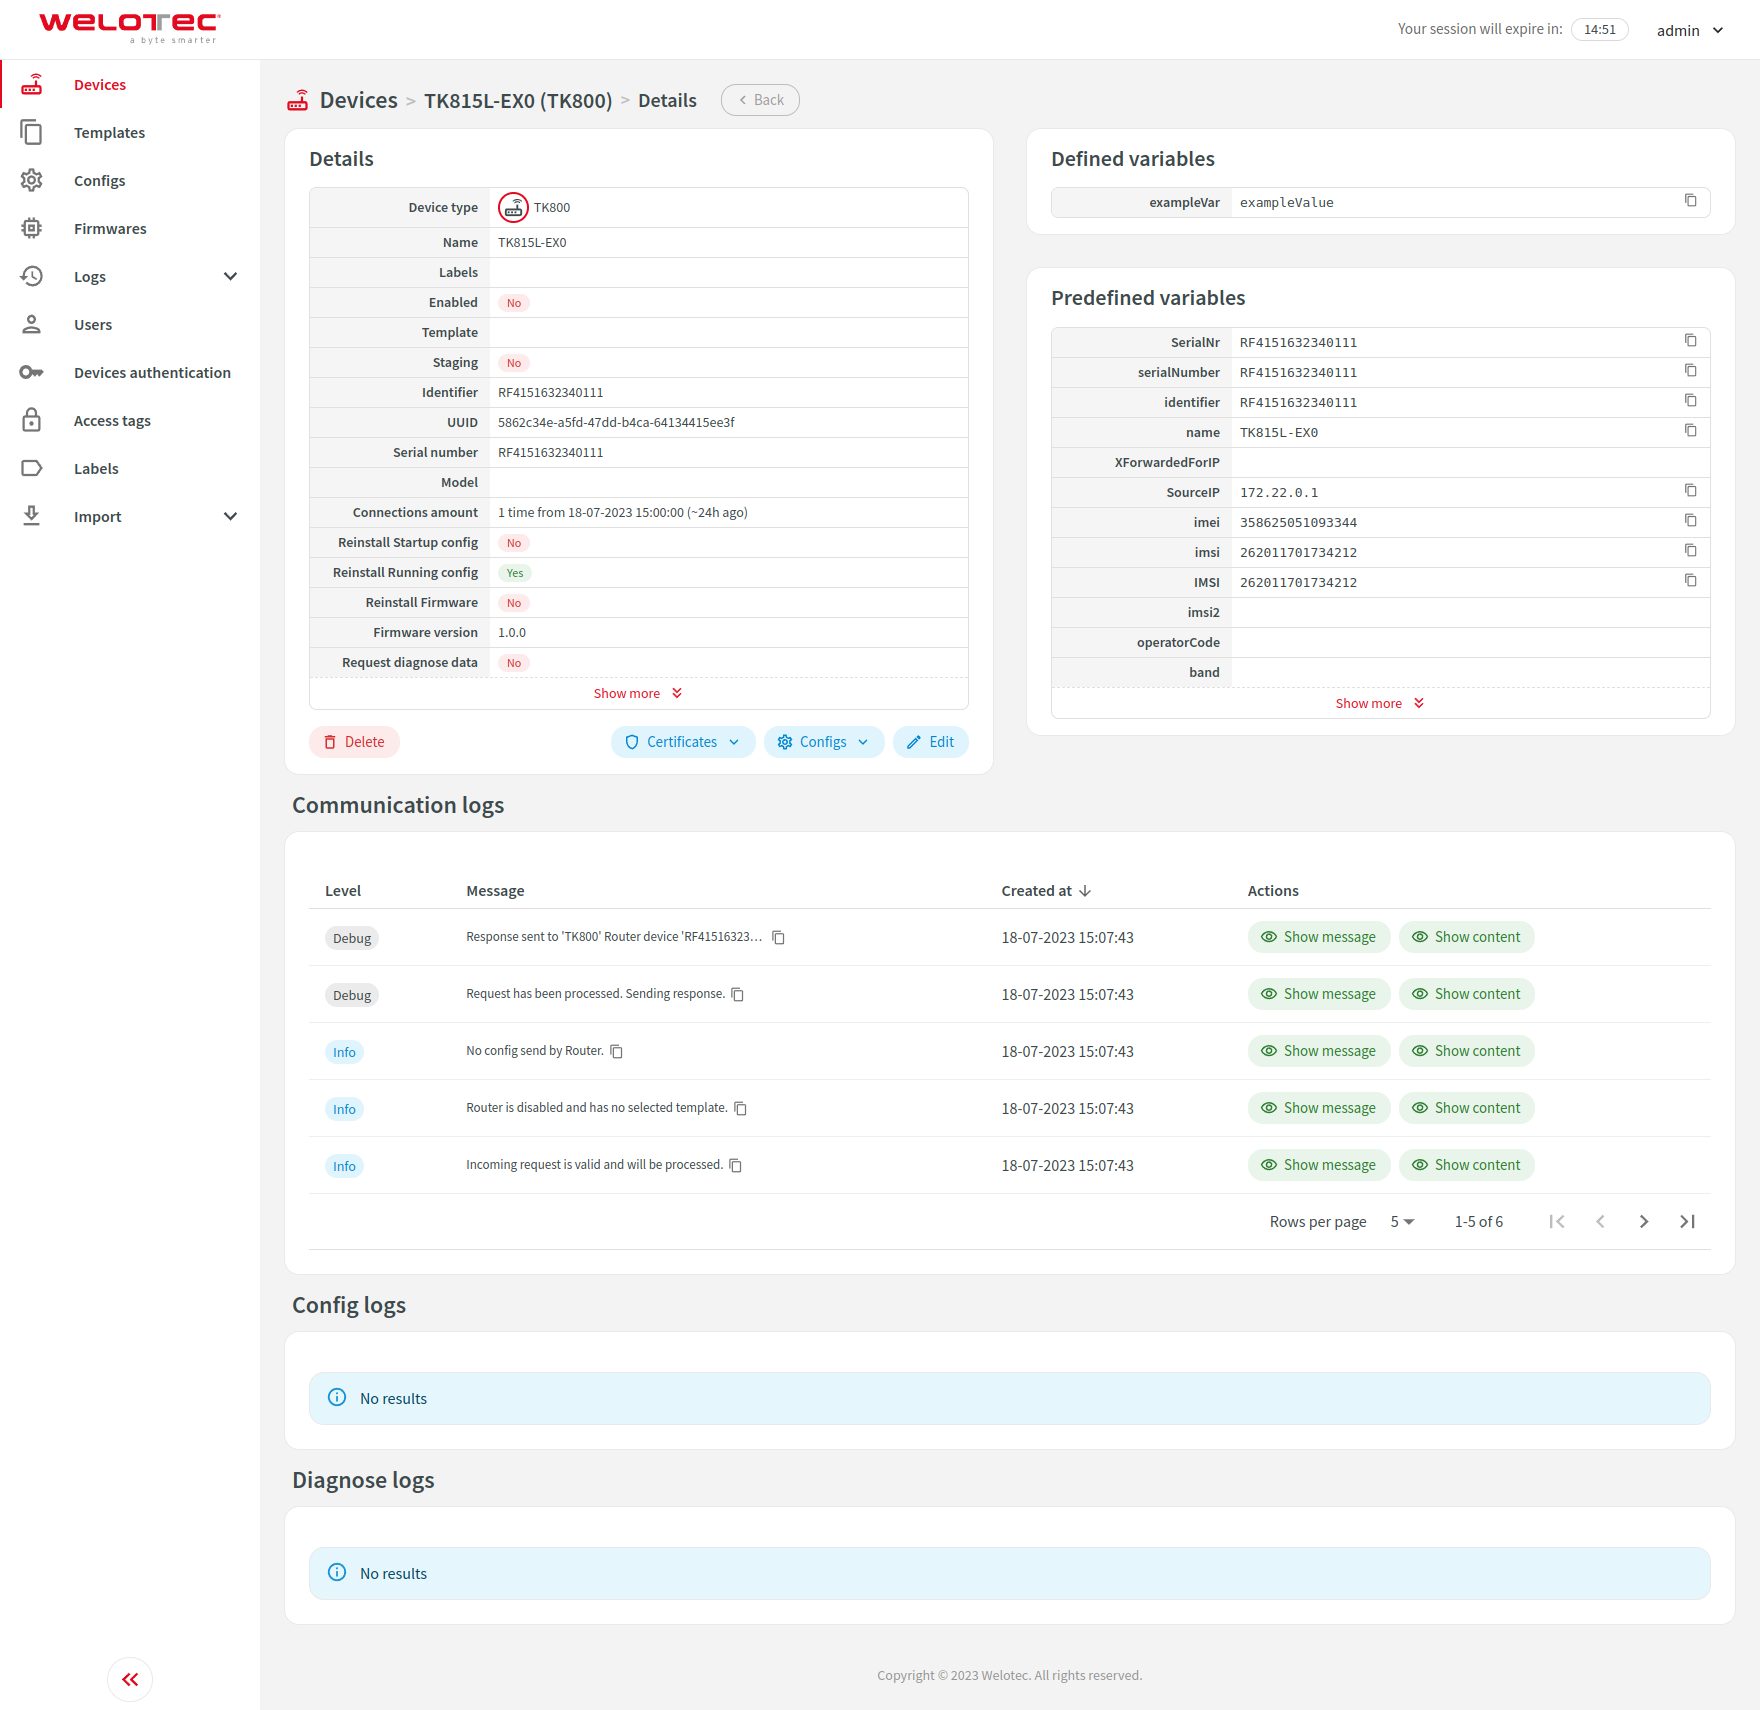
Details
The screen provides detailed information about a single device. The contents of this screen may differ between devices because they may support different functionalities.
You have access to similar actions as described in the “Row actions” section. You can additionally use the “Configs” button which allows you to view generated config for this device. It is only visible for devices that support at least one config.
Templates
This section allows you to manage existing templates.
Row actions
You can perform the following extra actions on a single row:
Details - Open details about a template. Please refer to the Details section for more information.
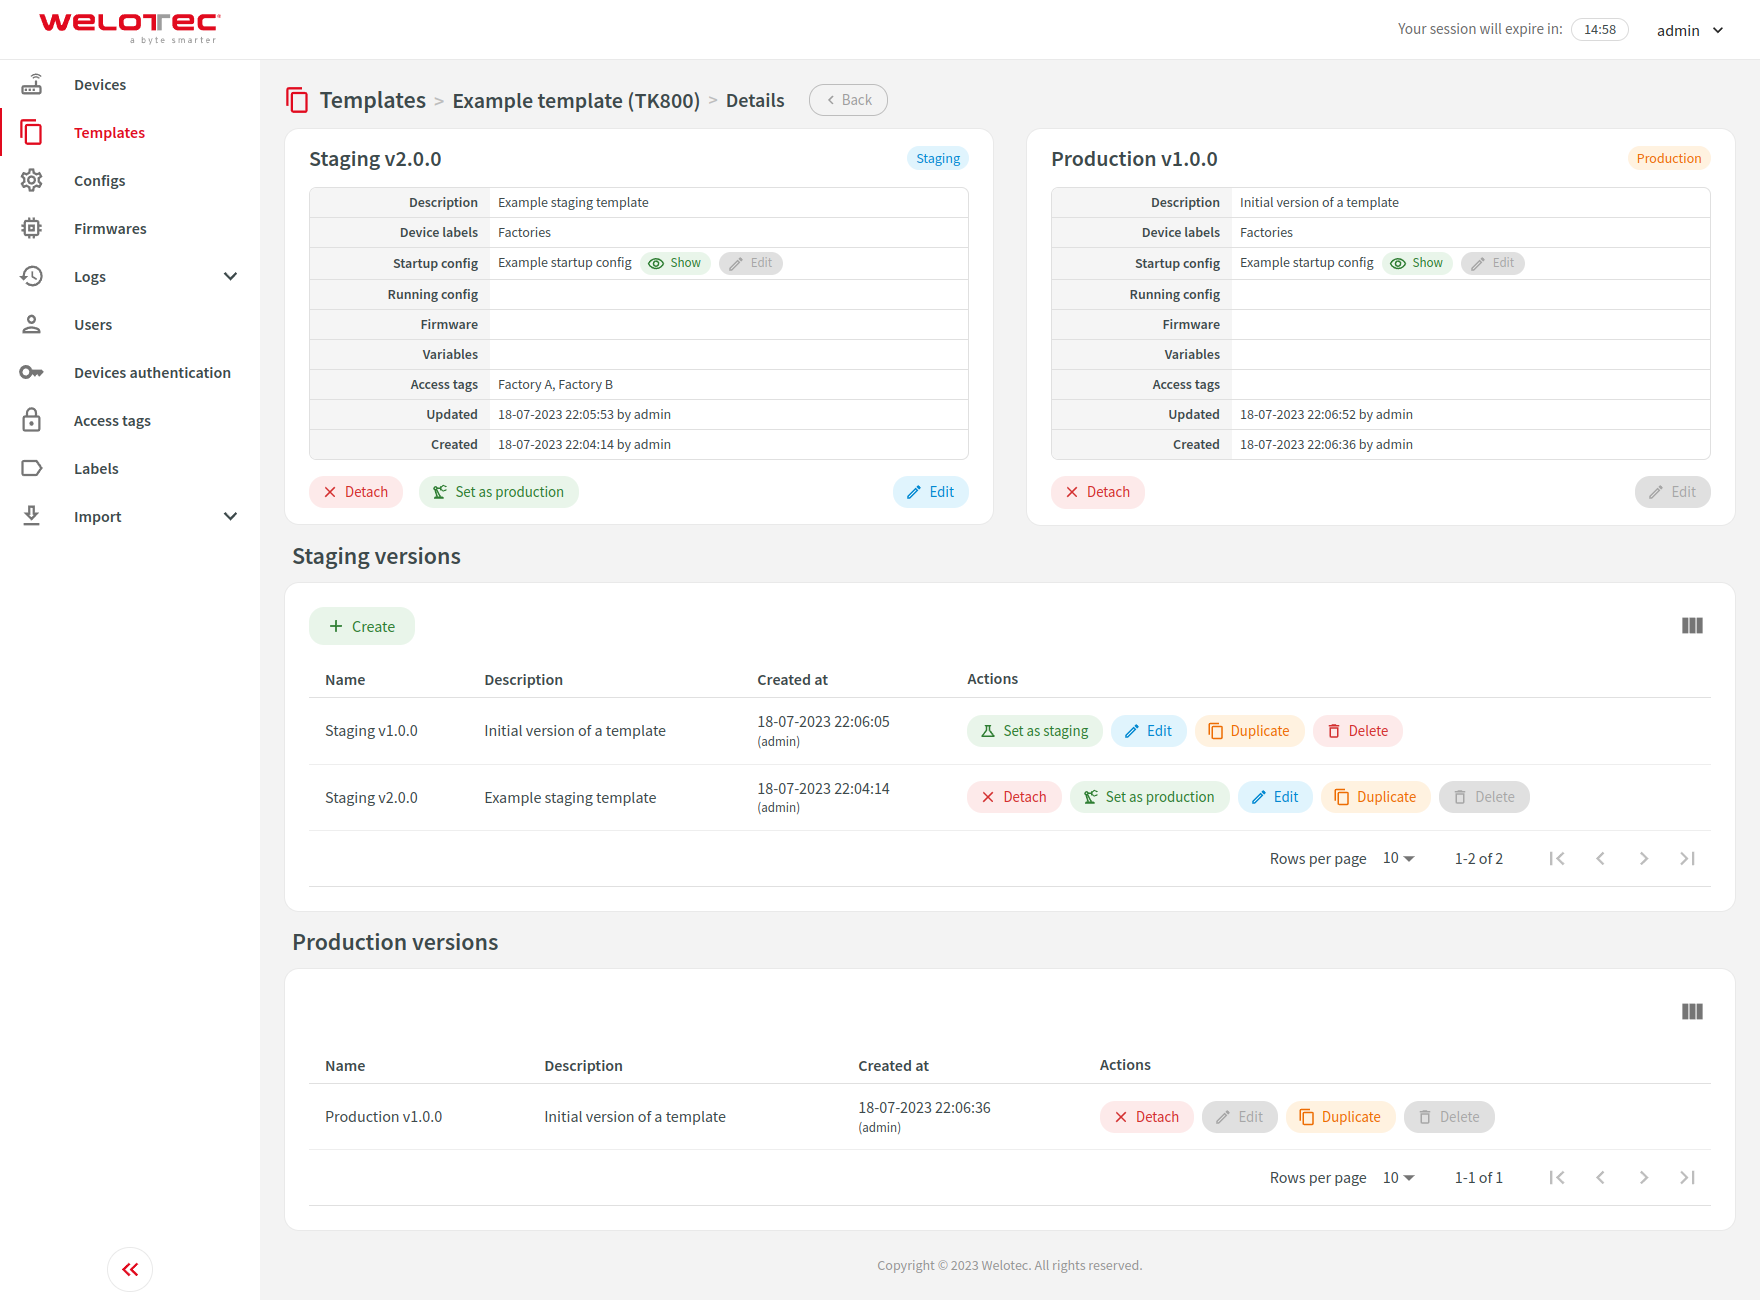
Details
The screen provides detailed information about a single template.
Templates can have multiple versions. Each template can have one version assigned as “Staging” and one version assigned as “Production”. Please refer to the Applying a template section for more information about using a template with a device.
When using the “Set as staging” or “Set as production” buttons a dialog will be shown with the possibility to reinstall supported configs and firmwares for all connected devices. For the “Staging” version this will only affect devices that have this template selected and their “Staging” flag is set to true.
A similar possibility is presented when editing the currently selected “Staging” version. When changing configs or firmwares you will see an option to change the connected reinstall flag.
You can also quickly show or edit selected config in the “Staging” version by using buttons in corresponding rows.
The selected “Production” version is not editable to avoid accidental modification of the production environment and keep track of past versions.
Configs
This section allows you to manage existing configs.
Row actions
You can perform the following extra actions on a single row:
Show - Open a dialog with the contents of the selected config.
Duplicate - Duplicate selected config.
Content with variables
The content supports variables. This allows you to use a single config for multiple devices (through templates).
There are many predefined variables for every device that supports variables. You can also define custom variables in a device. You can view both defined and predefined variables on the device details screen.
Variables are available inside content as a Twig or PHP (deprecated) variable.
Generators
SMART EMS currently supports two ways of generating configs.
Twig config generator - Config is generated using the Twig template engine.
PHP config generator - Config is generated by evaluating PHP code (deprecated).
Config generators can be enabled or disabled via Settings. By default PHP config generator is disabled.
You can find more information about the Twig template engine here Twig.
Firmwares
This section allows you to view a manage existing firmwares.
List actions
Exported CSV and Excel files will include additional rows for every hardware file existing in a firmware. For hardware file rows columns “Source”, “File name”, “MD5”, “Created at”, “Updated at”, “Created by”, “Updated by” will refer to hardware file instead of firmware.
You can perform the following extra list actions:
Create with hardware files - Create firmware with hardware files support. You will be presented with a list of device types that support hardware. You can enable hardware support for a device type on its’ edit screen.
Row actions
You can perform the following extra actions on a single row:
Hardware files - Redirects to a list of hardware files for selected firmware. Available only for firmwares that support hardware files.
Download - Download uploaded firmware.
Show URL - Open a dialog with the external URL of the selected firmware.
Show update path - Open a dialog with the update path of the selected firmware.
Duplicate - Duplicate selected firmware.
Firmwares hardware files
This section allows you to view a manage existing hardware files for a single firmware.
Row actions
You can perform the following extra actions on a single row:
Download - Download uploaded firmware hardware file.
Show URL - Open a dialog with the external URL of the selected firmware hardware file.
Logs
Login attempts
This section allows you to view a list of login attempts.
Device failed login attempts
This section allows you to view a list of device failed login attempts.
Secret logs
This section allows you to view a list of secret logs.
Row actions
You can perform the following extra actions on a single row:
Show message - Open a dialog with the contents of a message of the selected secret log.
Show updated secret - Open a dialog with the updated device secret value of the selected secret log.
Show previous secret - Open a dialog with the previous device secret value of the selected secret log.
Communication logs
This section allows you to view a list of device failed login attempts. Please be aware that by default only a few selected columns are visible, you can adjust them by using the visible columns functionality.
Row actions
You can perform the following extra actions on a single row:
Show message - Open a dialog with the contents of a message of the selected communication log.
Show content - Open a dialog with the contents of a request or response that is connected to the selected communication log.
Device commands
This section allows you to view a list of device commands. Please be aware that by default only a few selected columns are visible, you can adjust them by using the visible columns functionality.
Config logs
This section allows you to view a list of config logs. Please be aware that by default only a few selected columns are visible, you can adjust them by using the visible columns functionality.
Row actions
You can perform the following extra actions on a single row:
Show content - Open a dialog with the contents of the selected config log.
Communication logs - Redirects to communication log screen with rows associated with selected config log.
Diagnose logs
This section allows you to view a list of diagnose logs.
Row actions
You can perform the following extra actions on a single row:
Show content - Open a dialog with the contents of the selected diagnose log.
Audit logs
This section allows you to view a list of audit logs.
Row actions
You can perform the following extra actions on a single row:
Show values - Open a dialog with the logged values. Depending on type of change dialog will show:
New values for create
New and old values for update. You can choose way of presenting those values: full difference, only changes, old values or new values.
Old values for delete
Users
This section allows you to manage existing users.
Row actions
You can perform the following extra actions on a single row:
Enable - Allows you to enable the selected user.
Disable - Allows you to disable the selected user.
Change password - Allows you to change password for the selected user.
Reset secret - Allows you to reset secret for the selected user. Only available when two-factor authentication is enabled in the system.
Reset login attempts - Allows you to reset login attempts for the selected user. Only visible when the user exceeded the configured limit for failed login attempts.
Certificates - Expandable group of actions connected to certificate management of the selected user. Visible only for supported certificate types.
Upload separate files - Opens a dialog that allows you to upload a public key, private key and CA certificate.
Upload single file (.p12, .pfx) - Opens a dialog that allows you to upload a public key, private key and CA certificate as a single PKCS #12 file.
Delete certificate - Delete certificates after they are uploaded as separate files or a PKCS #12 file.
Download certificate - Download public key as .crt file.
Download private key - Download private key as .key file.
Download CA certificate - Download CA certificate as .crt file.
Download .p12 - Download PKCS #12 file containing public key, private key and CA certificate.
Access restrictions
Administrator permissions
Users with administrator permissions have access to all functionalities and see all data.
SMART EMS permissions
Users with SMART EMS permissions are restricted to the following screens:
Devices
Templates
Configs
Firmwares
Logs
Communication logs
Device commands
Config logs
Diagnose logs
This user has limited access to devices based on access tags. Users with SMART EMS permissions will have access to a device when at least one access tag that he has assigned is also assigned to a device.
Templates, firmwares, configs and logs are also limited to only those that are connected to visible devices. User with SMART EMS permissions will not be able to change templates, firmwares and configs that are also used in devices that he does not have access.
Disabled users
Disabled users will not be able to log in to the system. They will be informed that their account is disabled on the login screen.
Device authentication
This section allows you to manage existing devices authentication.
Access restrictions
Permitted devices
Device authentication has to be restricted to one or more device types. This will allow the device authentication to be used only for permitted device types.
Disabled users
Disabled device authentication will not be able to log in to the system. The system will respond with a 401 Unauthorized response status code.
Labels
This section allows you to manage existing labels.
Labels are intended to be used as a way to freely group devices.
Import
Devices
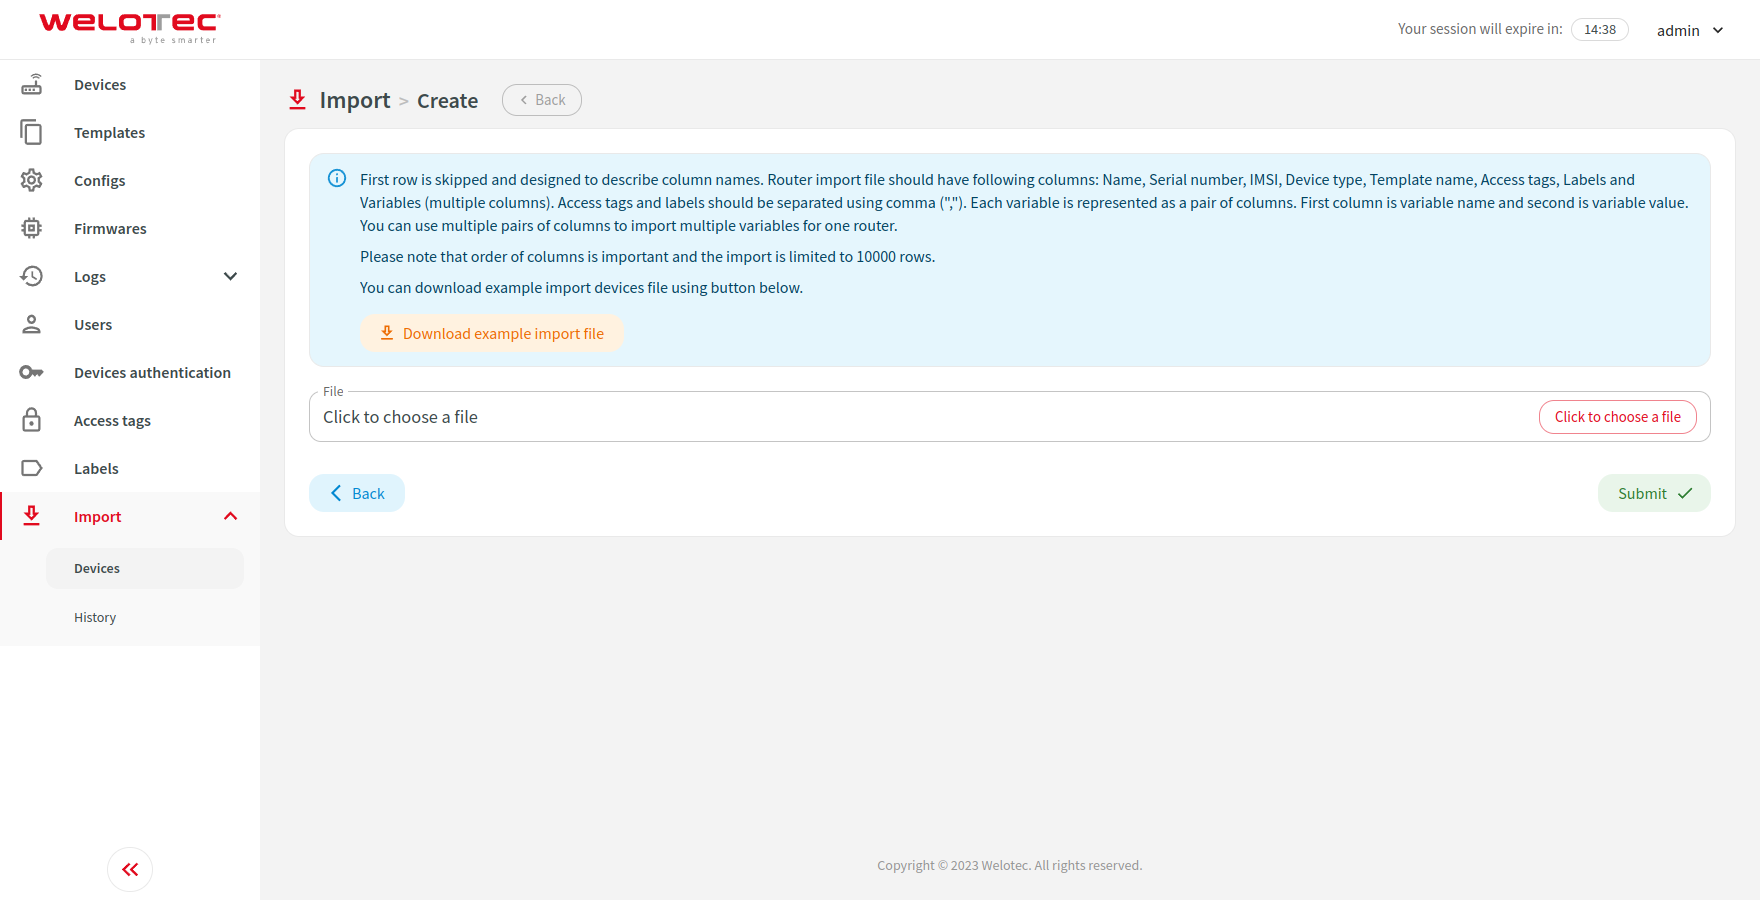
This section allows you to import devices using an Excel file. The process is divided into steps.
Step 1
Form with the possibility to upload an import Excel file. You can find more information about the expected column structure on the screen.
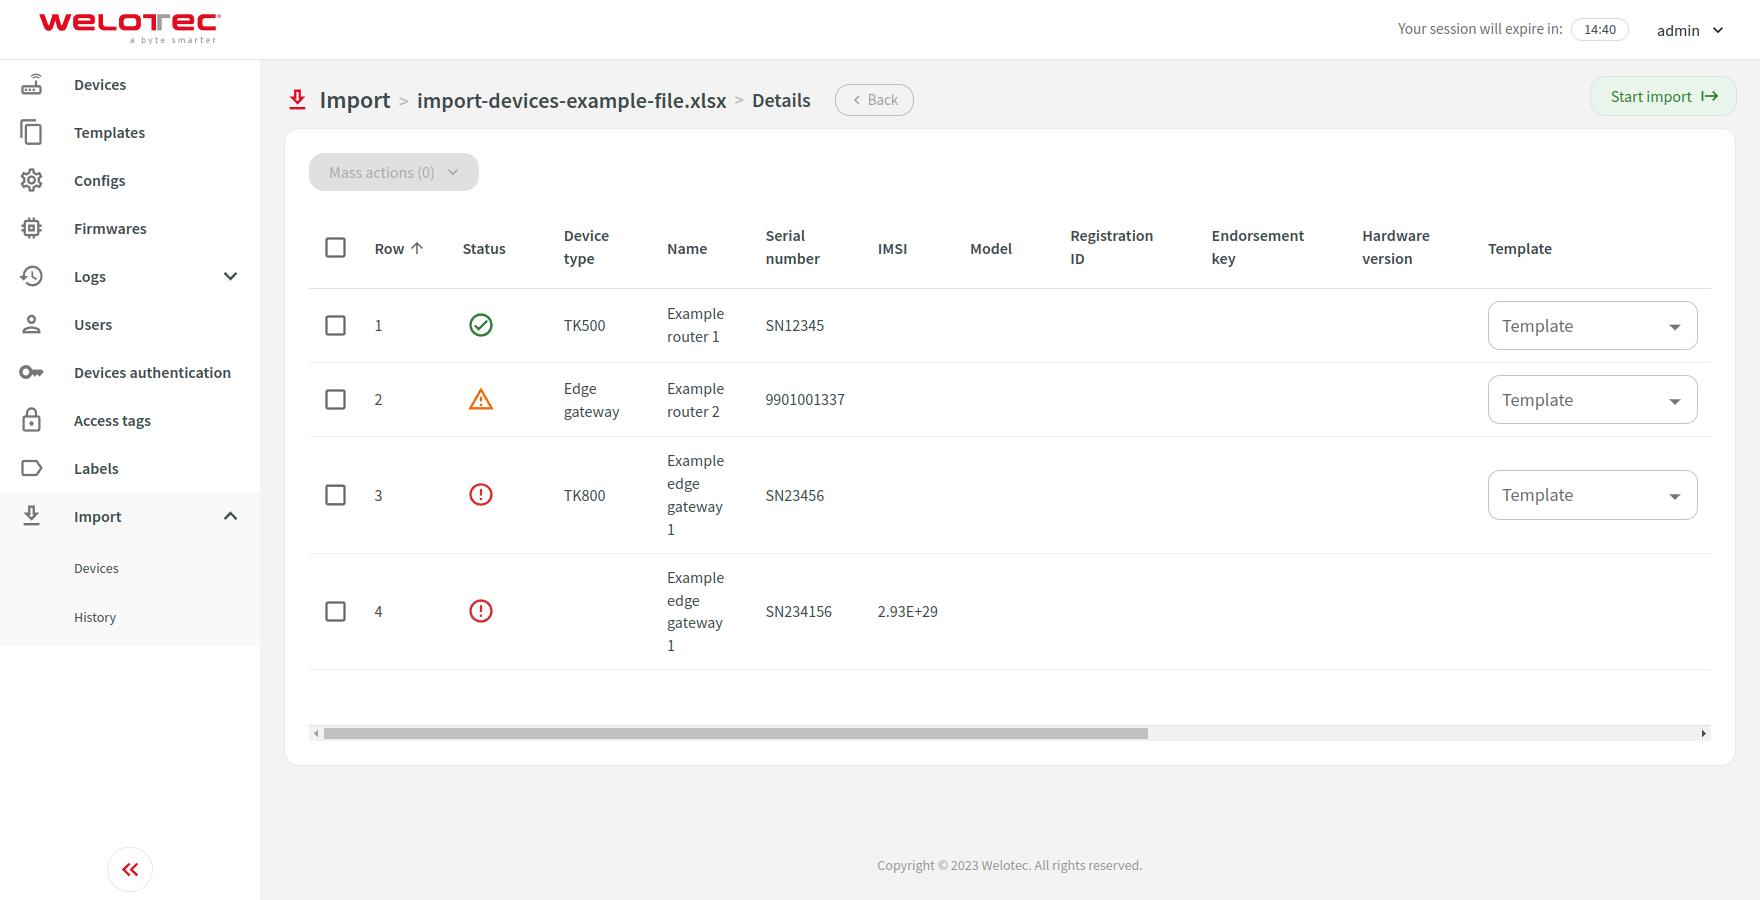
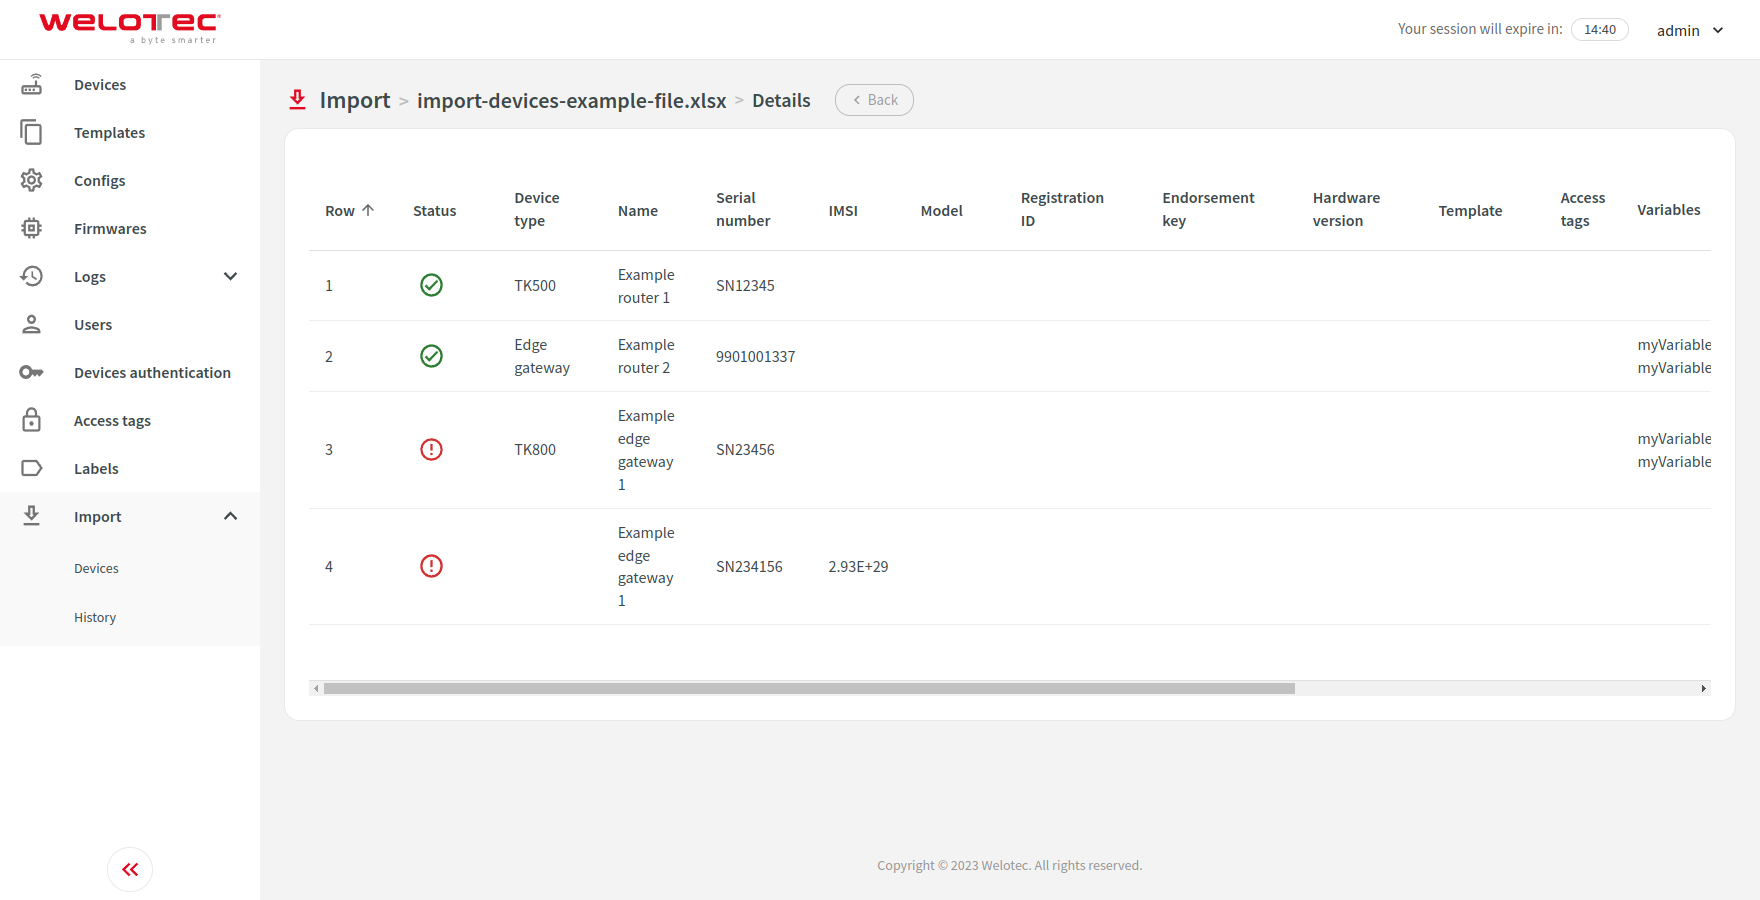
Step 2
The uploaded file is parsed and you are presented with rows that will be imported. Each row also includes a status which can be “Valid”, “Warning” or “Invalid”. Please click on the status icon to see more detailed information.
You can adjust imported rows by changing the data using inputs in columns or using mass actions.
After the imported rows data is ready, please click “Start import”. A dialog will be shown with an option to decide whether variables and access tags should be overwritten from selected templates. After clicking “Submit” the import process will start.
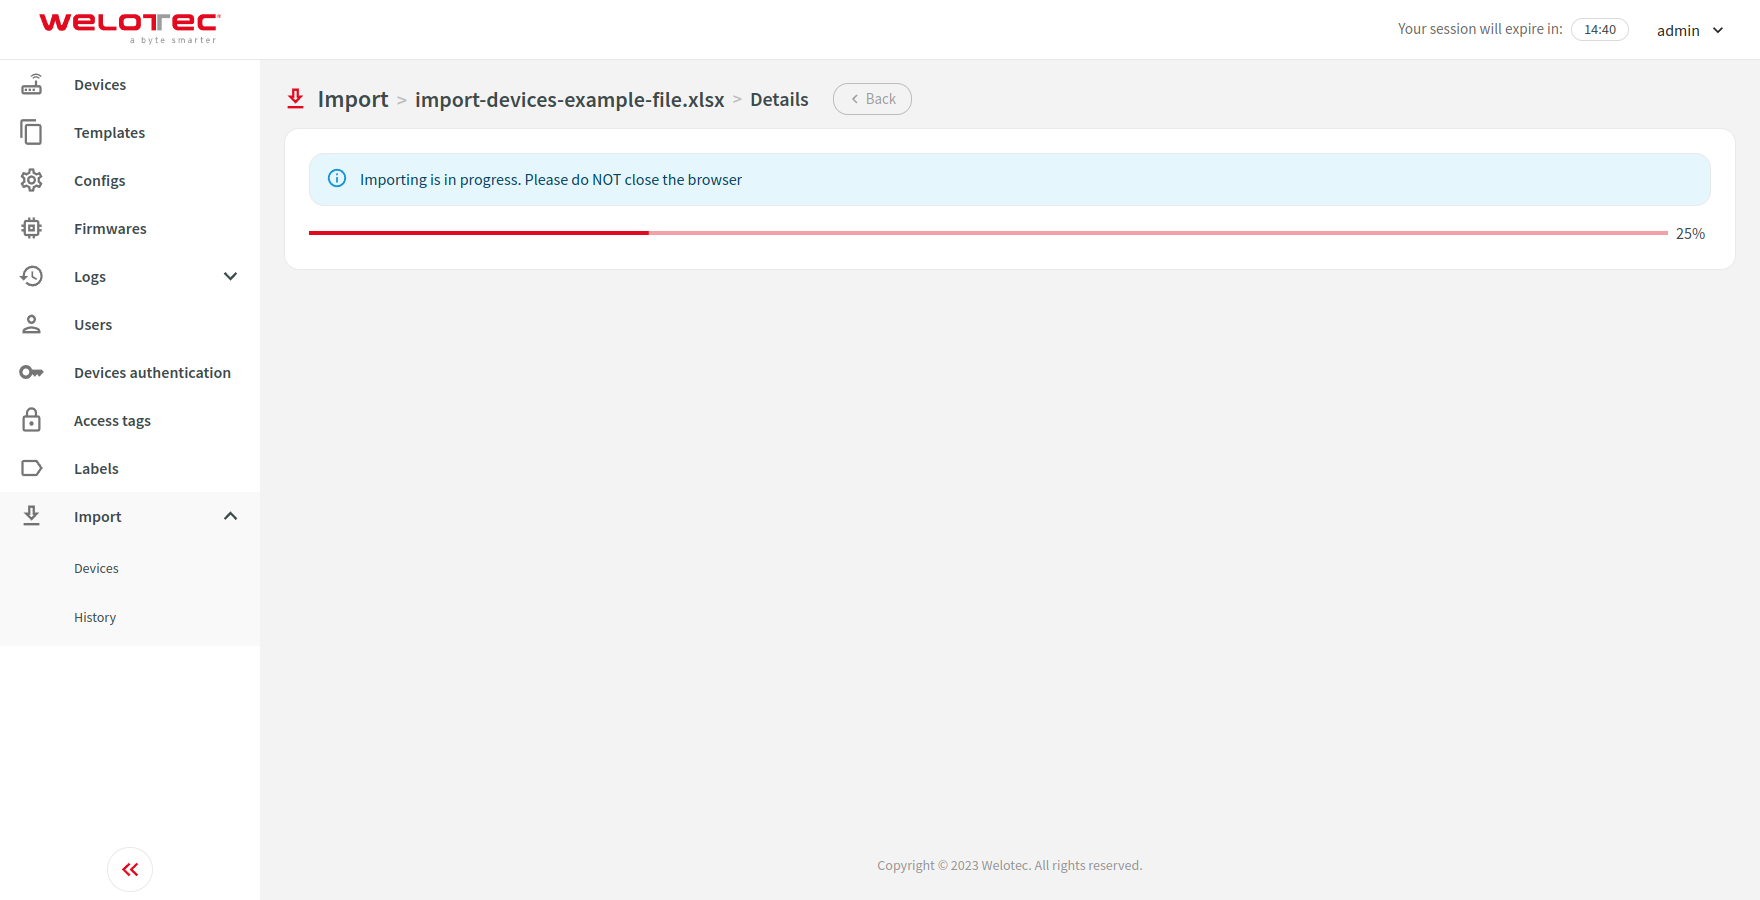
Step 3
This step informs you about import progress. As soon as it finishes you will be redirected to the next step.
Step 4
You can view details about imported rows for this specific import.
History
This section allows you to view a list of imports.
Row actions
You can perform the following extra actions on a single row:
Details - Open details about an import. Depending on the status it will redirect you to a proper step.
Continue - Continue importing rows. It will redirect you to step 3.